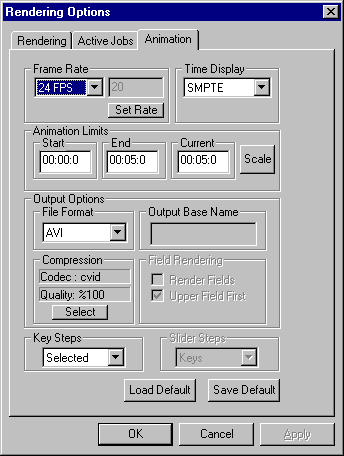
More detailed descriptions of the individual controls follow.
Frame Rate
There are two ways to set the frame rate for an animation. Either
chose a predefined rate (which will be one of the selections shown in Figure
10), or click the "Set Rate" button and enter the desired frame rate in the
dialog (Figure 11).

Predefined Frame Rates Combo Box
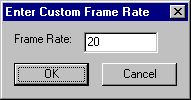
Custom Frame Rate (fps)
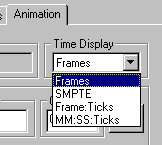
The time display option controls how time will be shown in the slider and
in the start/end time entries in the options dialog. Several possibilities
are available: Frames, SMPTE, Frame:Ticks, and MM:SS:Ticks. Figure
12 shows the pulldown for the time display options. Frames is a single
number,and is easy to interpret - note that this can be less useful than
a time oriented display since frame numbers will change if you change the
frame rate for an animation.
Animation Limits
There are three entries in the animation limits part of the dialog: Start
Time, End Time, and Current Time. The first two (start, end) define
the range of keys that are currently visible (the slider will only move between
start and end). Current Time is the frame that is currently active
(this value is also shown on the thumb part of the slider).
By changing any of these values and pressing Ok (or Apply if you want to
keep the dialog active), the new values will be applied to the keyframe controls.
If a range of keyframes doesn't fit the amount of time you want (they need
to be stretched in time), then the "Rescale Time" button give you access
to a dialog where the amount of time can be modified. See section x
for details.
Output Options
Since images will always be rendered to the file format specified in "Render|Render
Options" - the standard Moray dialog for rendering options. Animations
can be rendered in two basic ways, as an AVI file or as a sequence of individual
frames. When rendering as an AVI, you can select any installed CODEC.
When rendering as individual frames you can select any of the following output
image formats: BMP, DIB, PNG, PPM, TGA, TGA/RLE, or TIF. The selection
of output format is shown in figure 13.
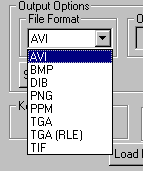
Output Format Combo Box
The Codec used to output an AVI can be modified by clicking on the "Select"
button in the "Compression" pane. You will be shown a standard Microsoft
dialog that allows you to select from any of the currently loaded Codecs.
The dialog will look like the one shown in Figure 14.
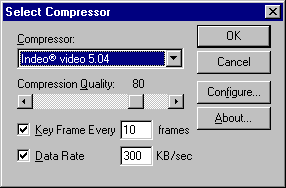
Codec Configuration Dialog
This determines how the left and right arrow buttons in the VCR panel function.
[Actually, this particular functionality is probably broken right now.]
By default, each time you click on one of the arrows, the slider will move
to the next key frame for the selected object. If you select "Object"
(which is only different from selected if you are working on a CSG), then
the arrows will take you to the next keyframe set for any part of the object.
If you were to select "Scene" in the list, then each click of the arrow would
take you to the next keyframe set anywhere in the scene (which may be before
the next keyframe of the currently selected object). The pulldown for
selecting key step options is shown in figure 15.
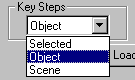
Key Step Options
[This function doesn't work as advertised - the slider will always move according
to the display representation of time. Normally this means that it
goes forwards/backwards by one frame.]
This controls how far the slider will move when the arrows on the left or
right of the slider are clicked. The pulldown for slider step is shown
in figure 16.
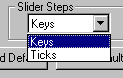
Slider Step Options
This pulldown may be inactive/disabled.
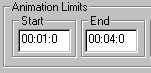
Rescale Time
If the duration of the animation (or some part of the animation) isn't quite
what you want, then you may need to rescale the time values. Before
invoking the rescaling dialog, you need to set the bounds of the times you
want to scale. For example, you may have an animation that goes from
0 to 10 seconds, but want the part from 1 second to 4 seconds (3 seconds
duration) to take a total 4 seconds. To do this, you would start from
the animation options dialog and set the start and end times to 1 and 4,
as shown in Figure 17.
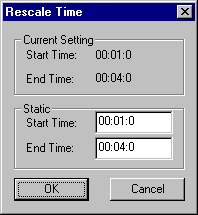
Rescale Time - Beginning and Modified Limits
After entering the starting and ending points that you want to scale, you
must click "Apply" for the changes to be made on the timeline. After
clicking on "Apply", click on the "Scale" button. This will bring up
the rescale dialog with bounds as shown in Figure 18 (a). Since we
want the starting time to remain the same and just want the end to be 1 second
later, we enter 00:05:0 for the end time and click OK.
Rescale Time - Starting and Modified Bounds
After you finish this operation, you will probably want to reset the animation
limits (after the previous modifications, the slider will only go from 00:01:0
to 00:05:00). Simply enter 00:10:0 for the "End Time" and 00:00:0 for
the "Start Time" value before hitting OK on the Animation Options dialog.
NOTE: A more intuitive way of performing this operation, using a timeline
view, will be available in future versions of this plugin.