Tutorial - Move a Sphere
The following example demonstrates how to make a sphere follow a path and
then generate an animation.
Step 1 - Start Moray and create a sphere
The first step is to start Moray and create a starting scene. If you
are using default Moray settings, then when you click on File|New Scene, you
will get a scene that is: empty of object, contains one point light, and
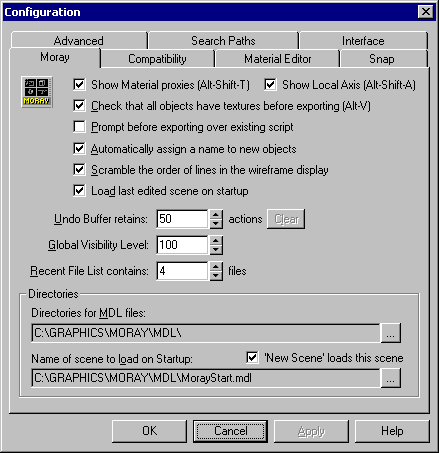
contains one camera. The default configuration for Moray can be seen
in View|Configuration as:
If you have changed the startup file (or unchecked the "New Scene loads
this..."), then you will need to create a camera and a point light.
After starting Moray and starting a new scene, from the "create" tab, click
on the sphere button. You should see a Moray screen that looks like
the one below.
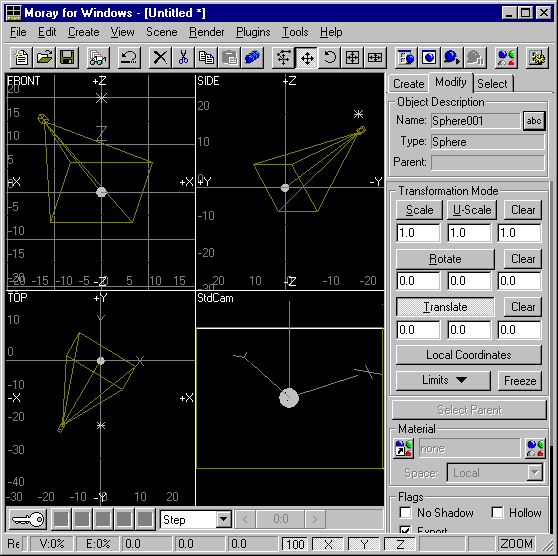
First Step - Open Moray and Create a Sphere
Step 2 - Set the bounds of the animation
For this animation we will use 24 frames per second, with a total duration
of 5 seconds. The circled items in the dialog shown in Figure 22 are
all that need to be set.
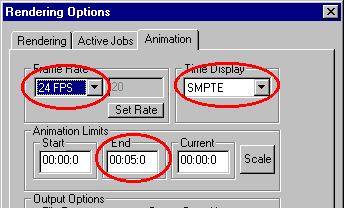
Setting the basic properties of an animation
Step 3 - Set the key frames
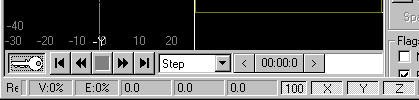
Begin by activating the keyframe control. Put the mouse over the
button with the key and click with the left mouse. This will leave
the button depressed, and the time slider will now be activated.
Starting the keyframing process
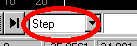
If the slider doesn't show a time of 00:00:0, then click on the left most
VCR button to bring the slider back to the first frame (alternately, drag
the slider as far left as it will go).
Select the sphere and place it where it belongs at the beginning of the
animation.
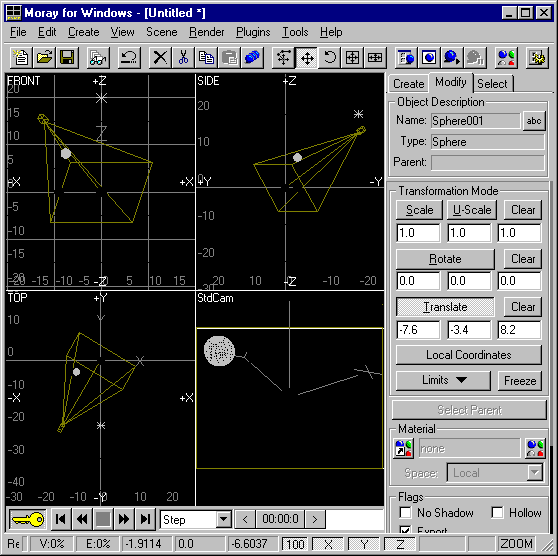
Setting the first keyframe
The color of the key button now goes to yellow - indicating that there
is a key set at this point in time.
Next, move the slider all the way to the right (either by dragging, or
by clicking the right most VCR button). Again, move the sphere somewhere.
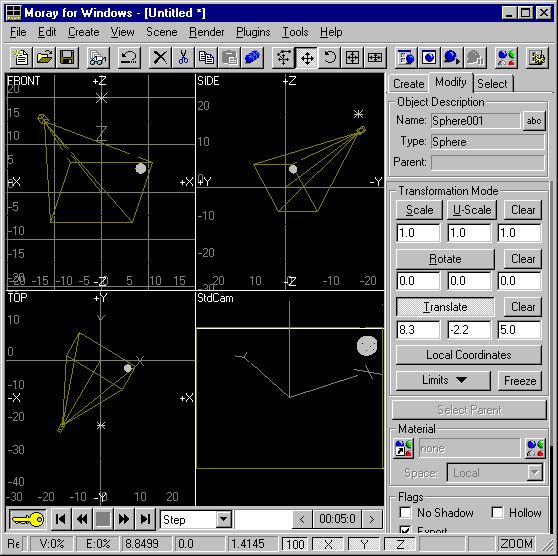
Setting the last keyframe
If you now click on the middle of the slider and drag it back and forth,
you would expect to see the sphere move smoothly between the first location
and the end location. If you see it suddenly jump from the first location
to the last (and that's not what you want), then you should change the type
of interpolation that is performed on the object. This selection is
just to the right of the VCR controls.
If the interpolation selection is set to "step" (see Figure 26), then this
jumping action is correct - the last keyed values for the object will be
used, right up until the next keyframe is reached. The other two choices
are linear and cubic interpolation.
Interpolation combo box
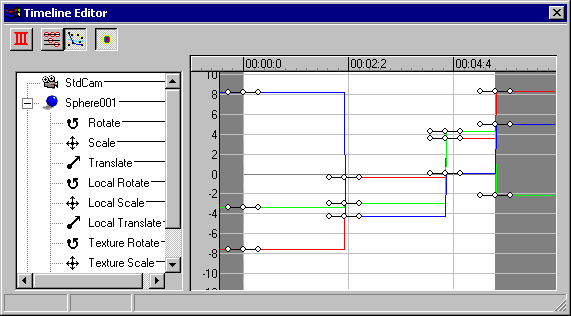
If you are using linear interpolation, then looking at the timeline, you
would see the following (assuming you were to select the "translate" entry
under Sphere001:
At this point, select cubic interpolation. This will result in a
nice smooth path in the resulting animation. The selection should
now look like Figure 27.
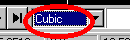
Using cubic interpolation
If you were to look at the timeline view after making this selection, you
would see something like this:
Before rendering, add a couple more key location, for example, one at 2
seconds and one at 4 seconds. Move the slider so that it shows 00:02:00
and move the sphere, then drag the slider so that it shows 00:04:00 and move
the sphere. You should see something like Figure 28 and Figure 29
when you do this.
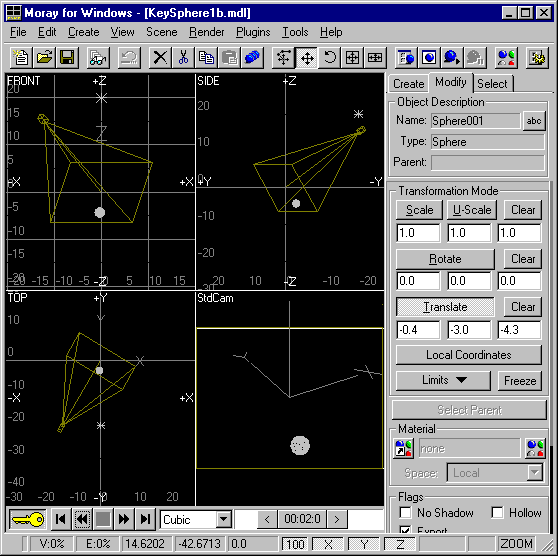
Adding an intermediate key value
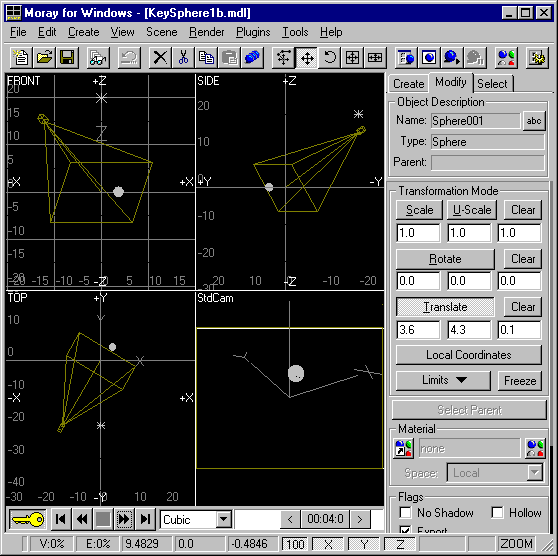
Adding a second intermediate key value
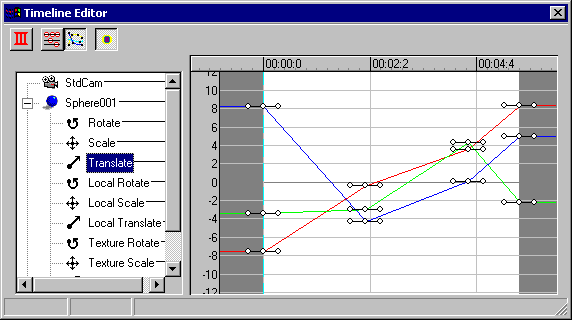
Once you have added the intermediate keys for the sphere, try dragging the
slider back and forth. You will see the sphere moving between the positions
that have been set.
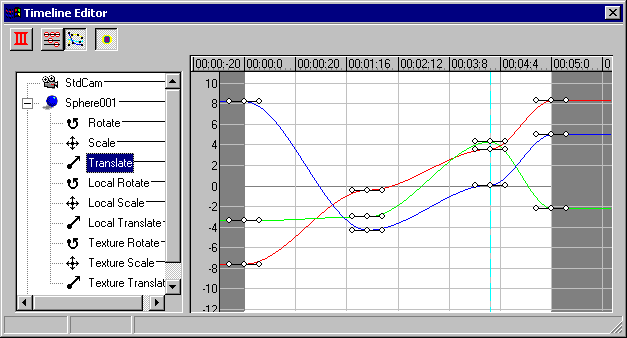
Taking a peek at the timeline (once again, select the translate comonent
of the sphere), you can see how the path of the sphere changes over time:
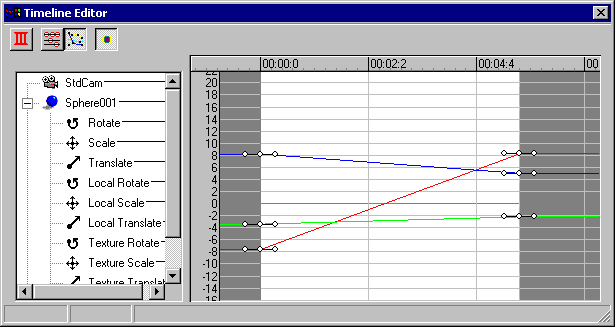
Using Step or Linear interpolation for the sphere would have resulted in
the following images:
If you haven't already saved your work, go ahead and do it now.
At this point, if you drag the slider back and forth, you should see the
sphere move along a somewhat twisty path. You are almost ready to
render the animation. The last thing to do is to assign a texture
to the sphere. See the Moray documentation for instructions on creating
and assigning textures.
Step 4 - Set rendering options
[TBD]
Step 5 - Generate the animation
Select Render|Animation from the main Moray screen. Sit back and
wait for all of the individual images to be generated.
The completed animation is available as an AVI file from
here.